
Geo Fencing
{primary} NOTE : Geo Fencing will work only when the options GPS and Geo Fencing are enabled in Timeclock Settings.
Enable Geo Fencing:
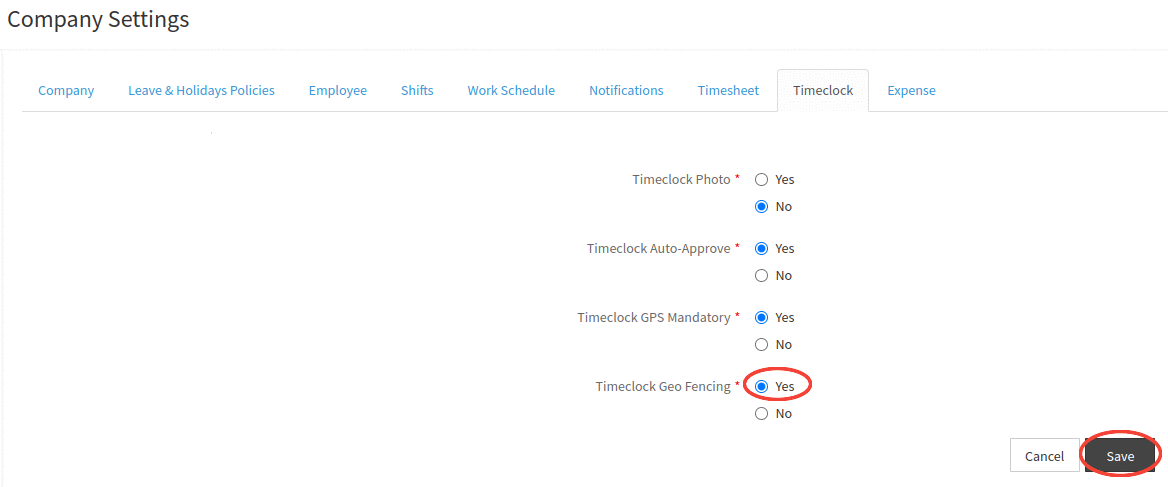
Step 1:
Go to Administration--> Company Settings--> Timeclock Tab--> Click on the Edit button.

Step 2:
On clicking on the Edit button, the Timeclock setting details will be changed to the enabled mode and you can modify the settings as per your requirement.
Step 3:
Select the Timeclock Geo Fencing to Yes and click on the Save button.
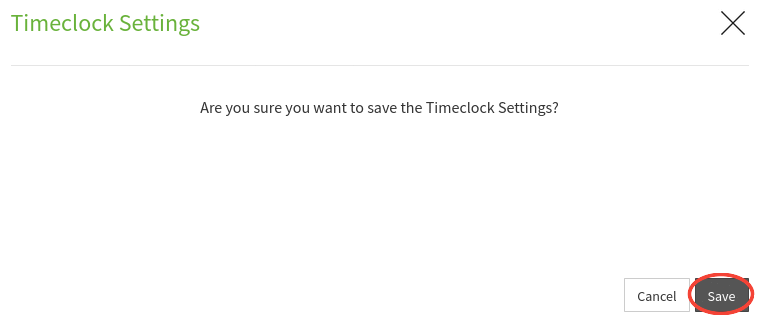
Step 4:
On clicking the Save button, a popup will appear prompting you to confirm to save the changes. Click on the Save button to confirm.
Step 5:
Upon click on Save button a confirmation message will be displayed and the page will redirects to the Work Location Tab in Company Settings.
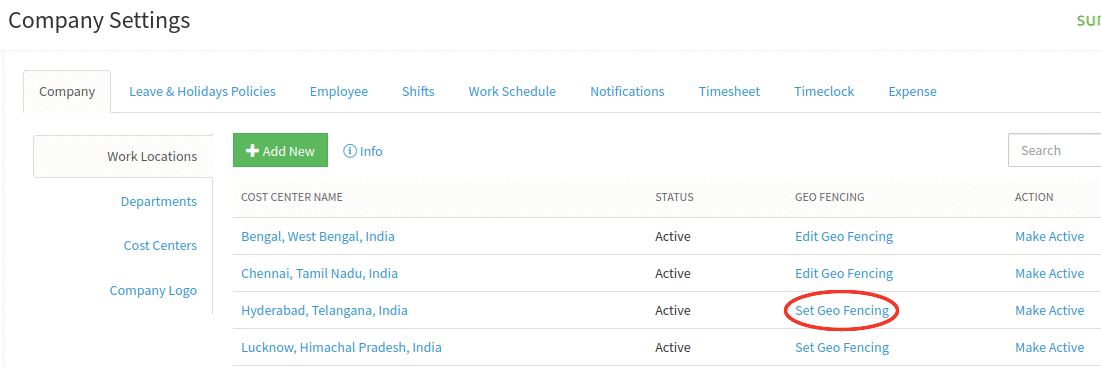
Add Geo Fencing:
Step 1:
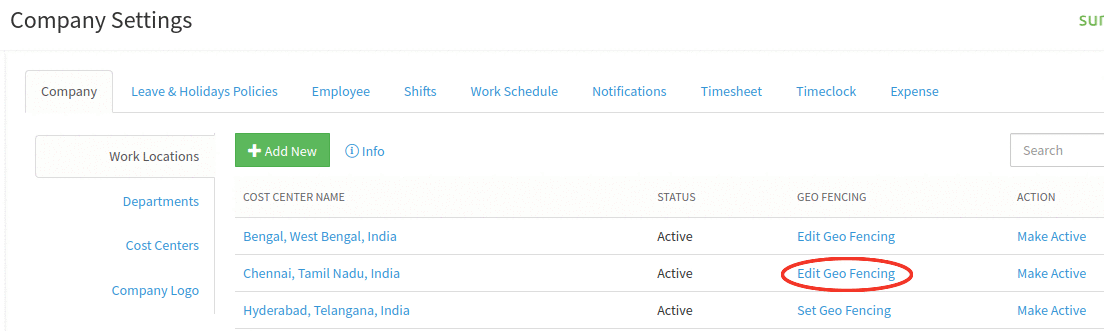
Go to Administration--> Company Settings--> Company Tab--> Work Location--> Click on the Set Geo Fencing link for particular work location.
Step 2:
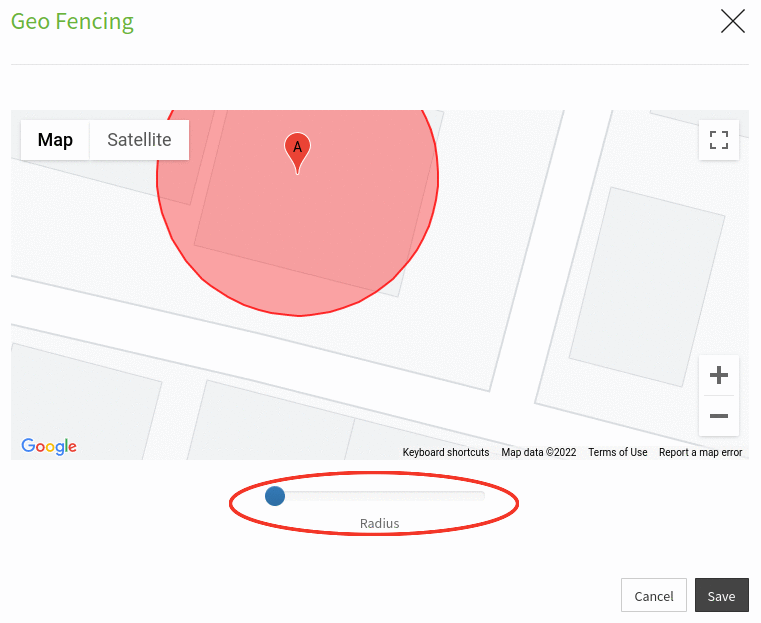
On clicking on the Set Geo Fencing link, by default current work location city will be shown. Upon the work location city zoom in to the particular area and select the actual location.
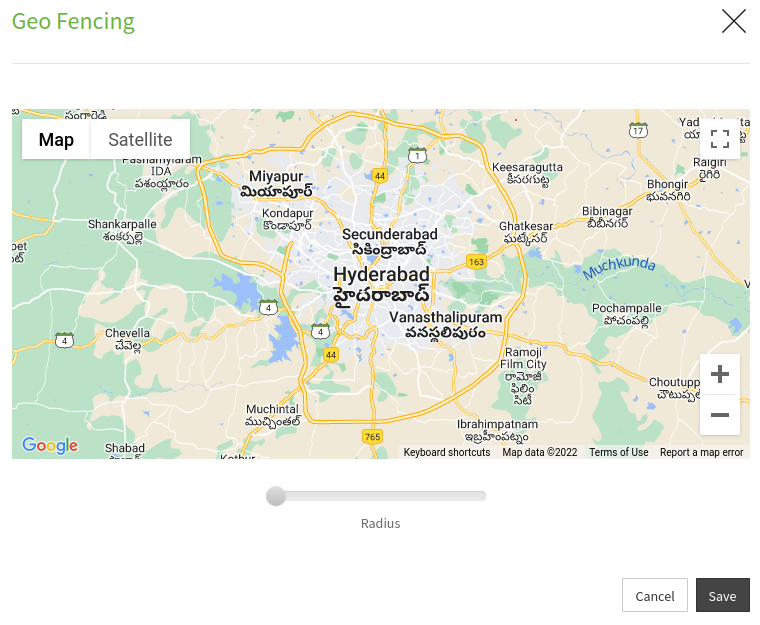
Step 3:
After selecting the actual location you can adjust the radius of the location with using slider as shown in the image.
Step 4:
After selecting the location, click on the Save button to save the Geo Fencing.
Step 5:
On clicking on the Save button, a message appears prompting you that the Geo Fencing has been updated successfully.
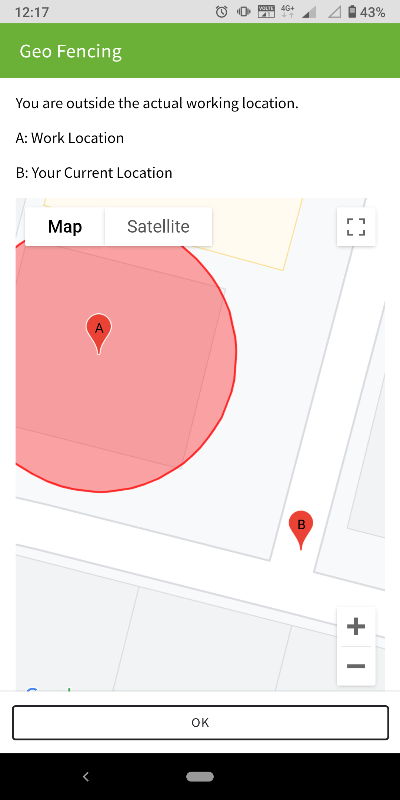
{primary} Note: After saving the Geo Fencing user can Clock IN to the timeclock app only when the user is in particular radius of the work location. If you are outside the working location radius then "You are outside the actual work location" message will be displayed as shown in the image.
Remove Geo Fencing:
Step 1:
Go to Administration--> Company Settings--> Company Tab--> Work Location--> Click on the Edit Geo Fencing link for particular work location.
Step 2:
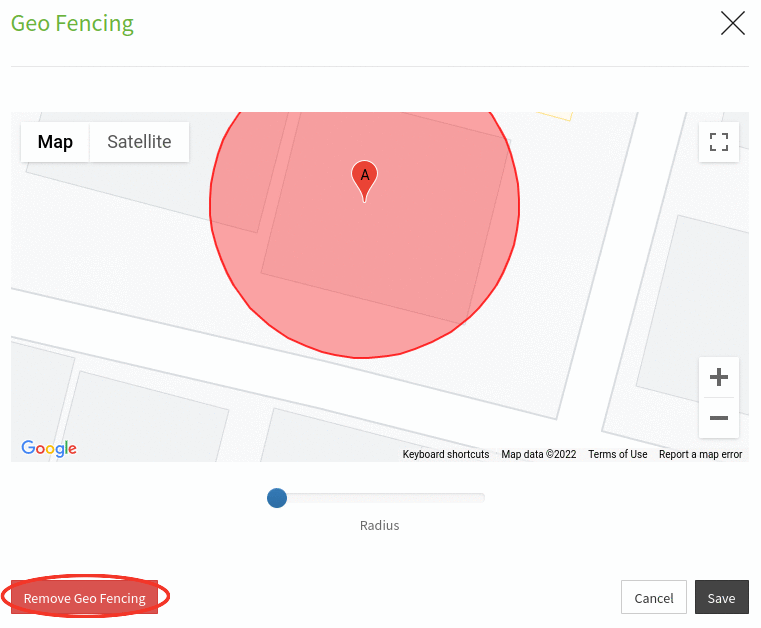
On clicking on the Edit Geo Fencing link, current work location will be shown. In that popup click on Remove Geo Fencing button as shown in the image.
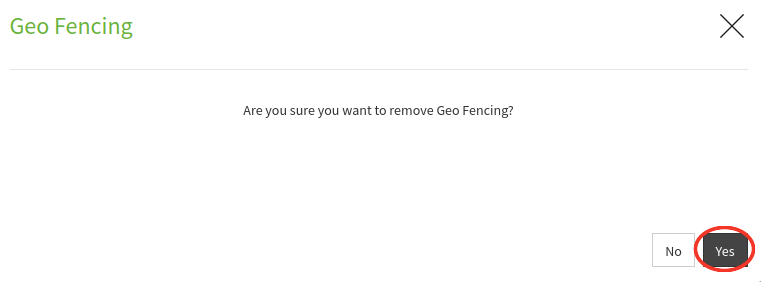
Step 3:
On click on Remove Geo Fencing button, a popup will appear prompting you to confirm to save the changes. Click on the Yes button to confirm.
Step 4:
On clicking on the Yes button, a message appears prompting you that the Geo fencing has been removed successfully.