
E-TDS Filling
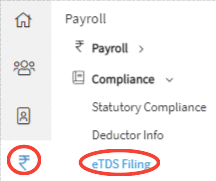
Step 1:
Go to Payroll--> Compliance--> eTDS Filing.
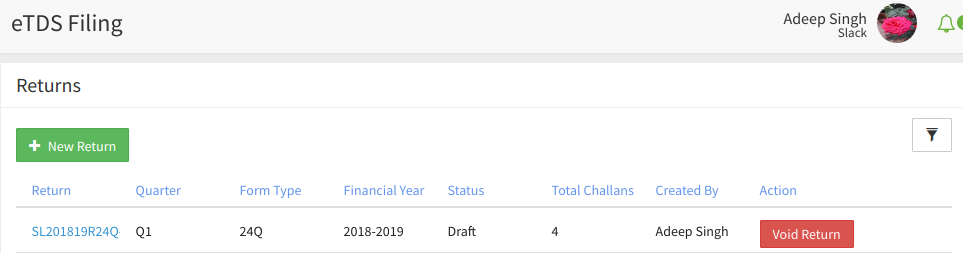
Step 2:
eTDS Filing page will appear on the screen and User can view the list of the previously filed returns.
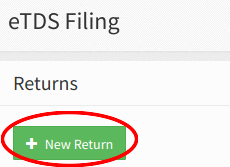
Step 3:
Click on New Return button to add a new return for eTDS filing.
Step 4:
Upon clicking on the New Return button, a popup will appear on the screen with a form to capture the details of return.
Step 5:
By default, the return type is selected as "Regular". Corrections cannot be done for now.
Step 6:
Select the Form Type from the drop-down. (24Q for Employee and 26Q for Consultants). Select the financial year. Select the Quarter for which the return has to be filed.
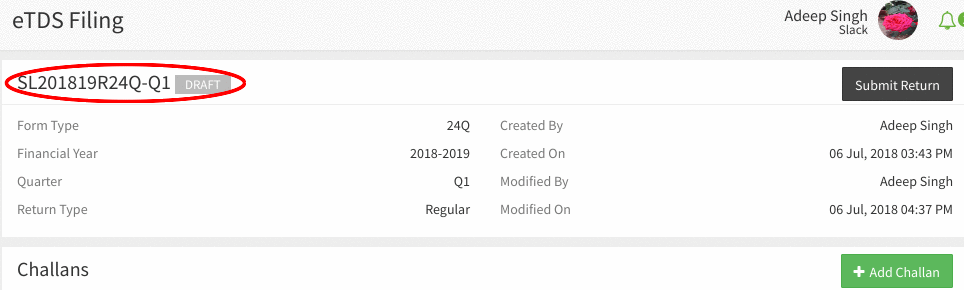
Step 7:
After entering the details in the form, click on the "Create" button. Upon on clicking on "Create" button, the popup will be closed and the User will be directed to the eTDS filing screen, where User can view the created 'Return' in "Draft" status.
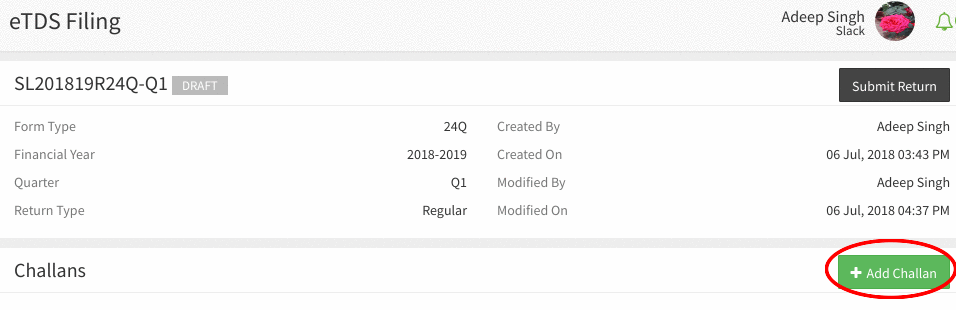
Step 8:
After reviewing the details, click on "+Add Challan" button.
Step 9:
Upon clicking on the Add Challan button, a popup with a form to capture the Challan details will appear on the screen.
Step 10:
Enter the details in the form and click on the "Save" button. Upon clicking on the "Save" button, the popup is closed and the previous screen will appear where the User can view the added challan in the 'Challan' grid.

{info} The Challan amount is the total TDS amount( TDS + Surcharge + EDU CESS) that is mentioned in the TDS report for the Particular pay period.
Step 11:
User can view the details of the challan by clicking on the challan number from the record in the challan list.

Step 12:
Can assign employees to the challan by clicking on the + icon or "Assign Employee" link under Total Employees.
Step 13:
After assigning employees to the challan(s) click on the Submit button, this will download Text file for validation.
Step 14:
Once the file has been generated, it should be verified using the File Validation Utility (FVU) provided by NSDL e-Gov. In case, if the file has any errors the FVU will give a report of the errors. Rectify the errors and verify the file again through the FVU.
Step 15:
The upload file generated by the FVU on successful validation is to be furnished to a TIN-FC.
Step 16:
User can edit the challan details by clicking on the Pencil icon. By clicking on the icon the "Edit Challan" popup will appear and User can update the details and click the "Save" button to save the changes.
Step 17:
Can delete the challan by clicking on the Trash icon. By clicking on the delete icon a popup will appear prompting the user to confirm the deletion. The user either needs to click the "Yes" button to confirm delete or "No" button to cancel the deletion.