
Leave Policies
- Creating New Leave Policy
- Assigning Leave Types to Leave Policy
- Assigning Employees to leave policy from Leave Policy Popup modal
- Assigning Employees to leave policy from View Employee
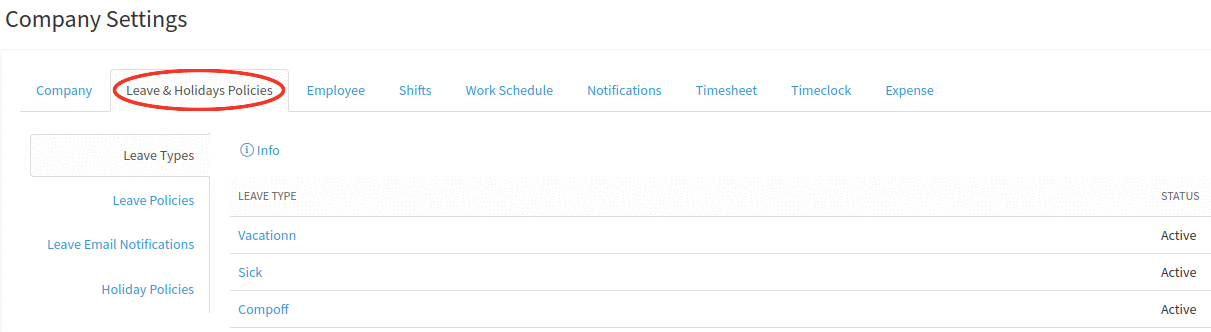
Step 1:
Go to Administration -> Company Settings -> Click on Leave Policies & Holidays tab.
Step 2:
All the leave types that are listed during the Account Set up will be displayed in the Leave types grid.
{primary} Note: For already existing companies all the existing leave types will be listed in the grid.
Step 3:
Click on Leave Policy.
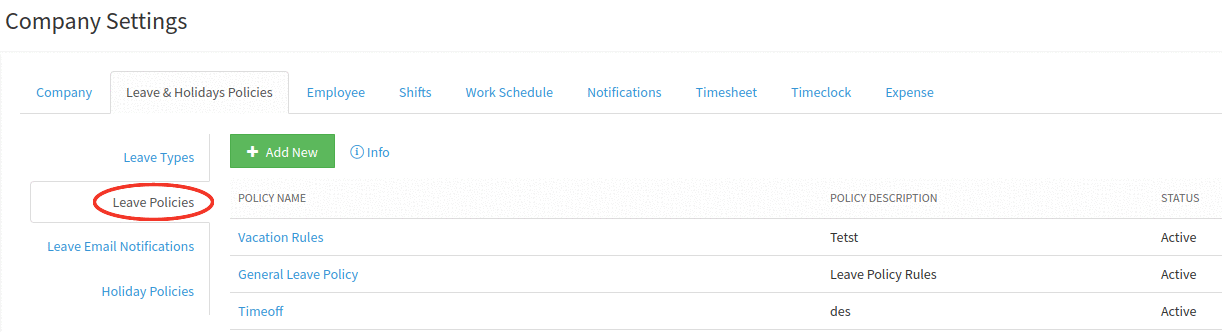
{primary} Note: For existing companies, default leave policy “General Policy” will be listed in the grid and all the employees will be assigned to the general policy. Users can create new leave Policy or edit the general policy and assign the policy to employees.
Creating New Leave Policy:
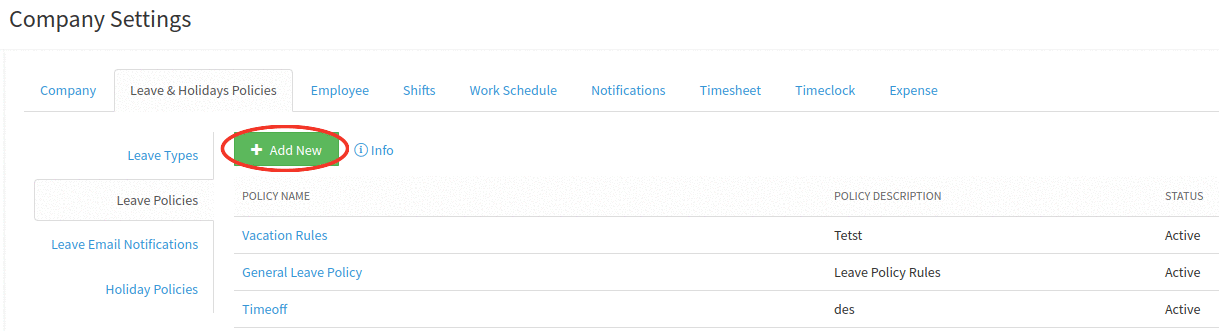
Step 4:
Click On “Add New” button.
Step 5:
On click on the “Add New” button Leave Policy popup will be displayed.
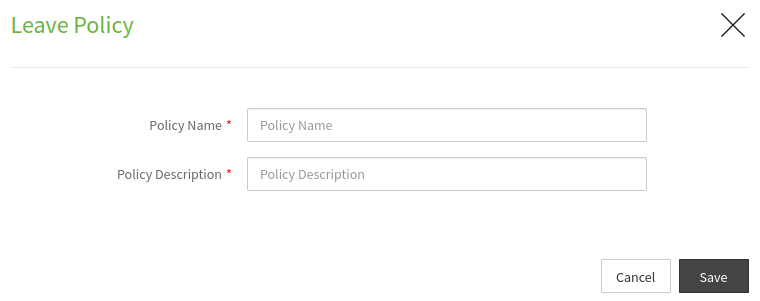
Step 6:
Enter the Policy name and Policy Description and click on “Save” button to create the Leave policy.
Step 7:
On click on the “Save” button, a confirmation message is displayed in the popup.
Step 8:
Click on the “Close” button or ‘X’ to close the popup window.
Step 9:
On closing the popup the Leave Policy grid will be displayed with the newly created leave policy listed in the grid with Active status.
{primary} Note: You can create upto 10 leave policies only.
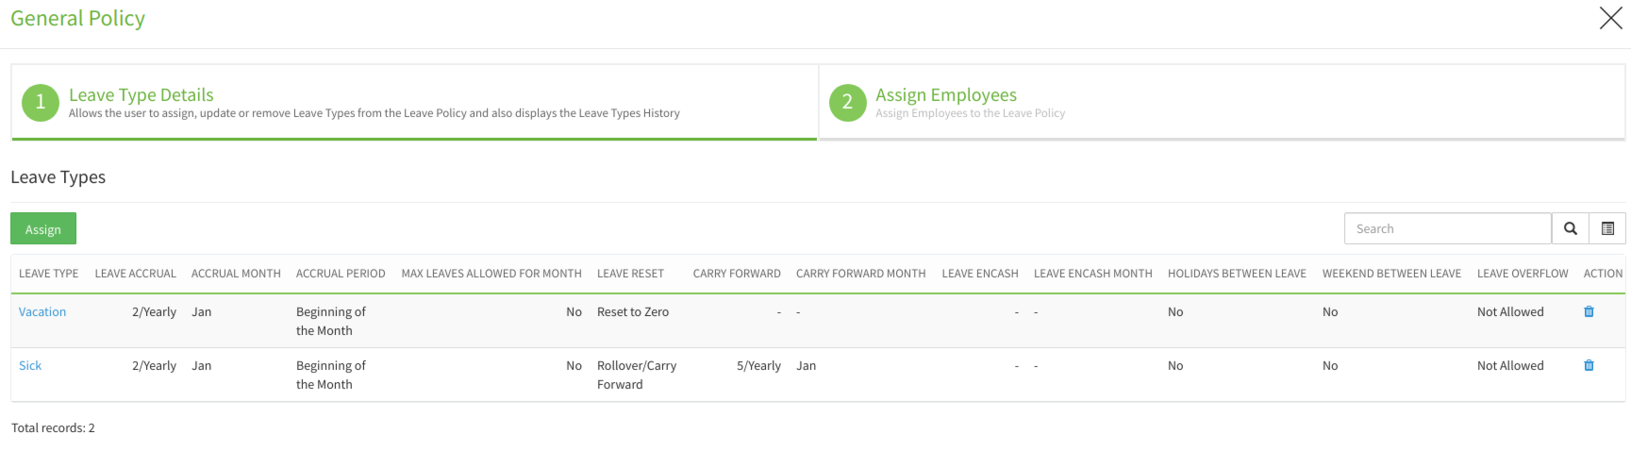
Assigning Leave Types to Leave Policy:
Step 1:
Click on the Leave Policy name to which you want to assign the leave types.
Step 2:
On clicking on the Policy name a Popup modal will be displayed with 2 tabs.
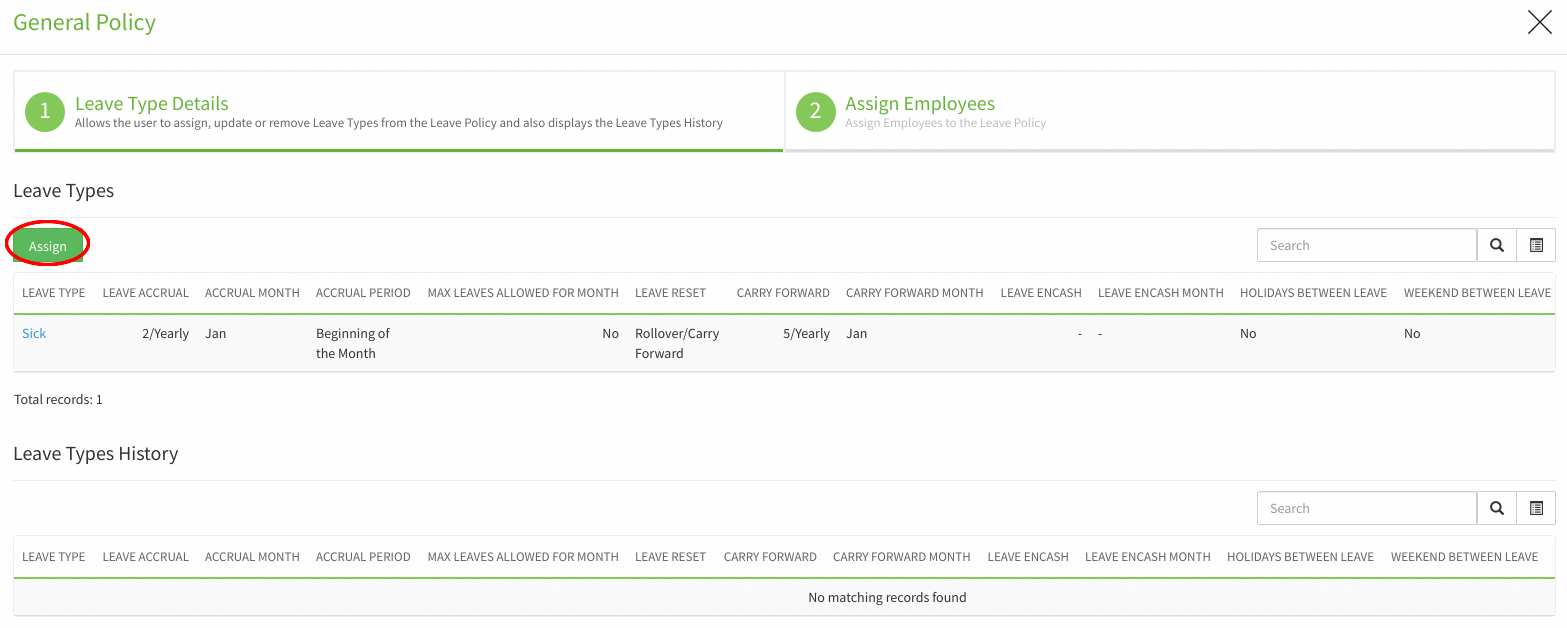
Step 3:
In the first tab, click on “Assign” button to assign the Leave types to the Leave Policy.
Step 4:
On click on the “Assign” button, “Leave Type” popup will be displayed.
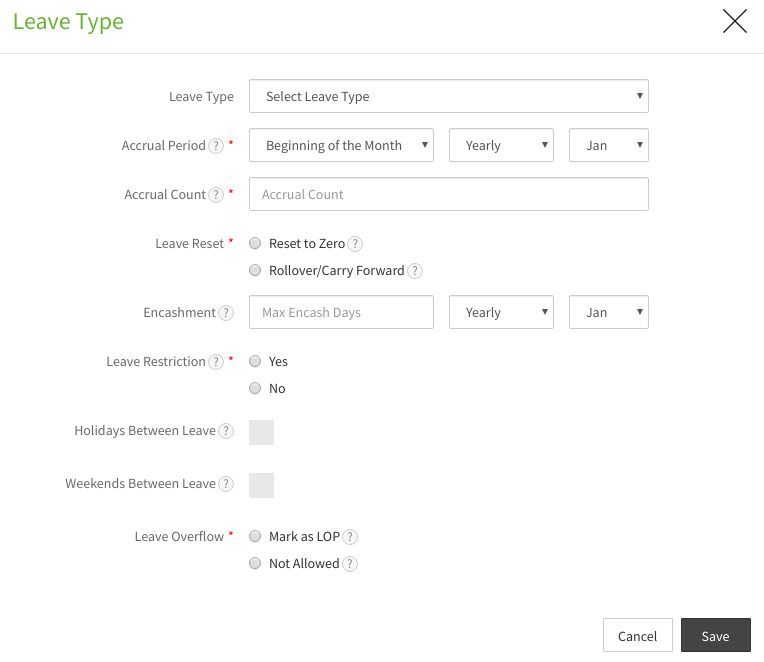
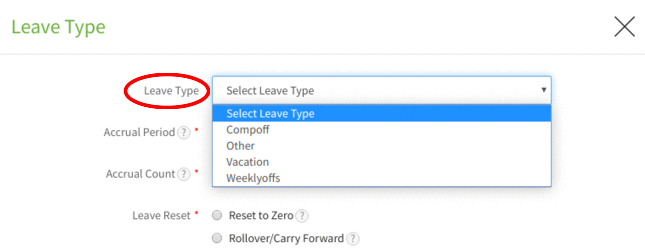
Step 5:
Select the Leave Type from the “Leave Type” drop-down.
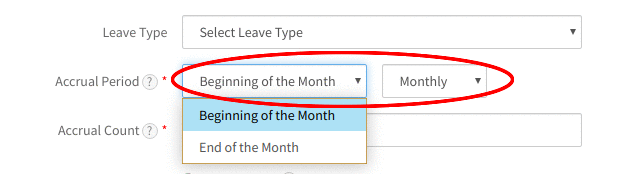
Step 6:
Set the Accrual Period based on your organisation’s requirement.
Accrual Period is the period which you want to set for leaves accrual either Monthly or Yearly. If you choose Yearly, then select the Month from the drop-down and the time frame(Beginning or End of the month).
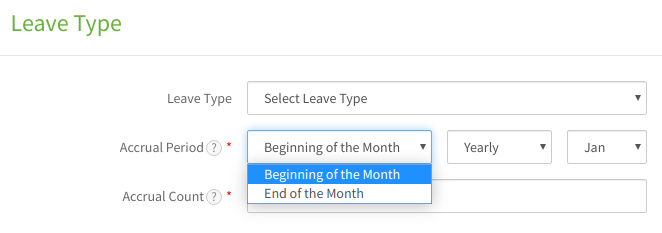
If you choose Month, then select the time frame at which the accrual to happen (Beginning or End of the month).
Step 7:
After setting the Accrual period, enter the Acccural Count.

Accrual Count is the number leaves you want to allot to the employees for the selected Leave type in the policy based on the accrual period (yearly or monthly).
Step 8:
After entering the ‘Accrual Count’, Select one of the options for Leave Reset. Either “Reset to Zero” or “Rollover/Carry Forward”.
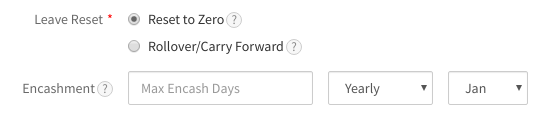
Reset to Zero: If this selected then all the available leaves/Leave balance will be reset to zero based on the above chosen Accrual Period.(yearly or monthly).
Roll Over/ Carry Forward: If this is selected then, the popup will display extra fields to capture the Leave Carry Forward count details.
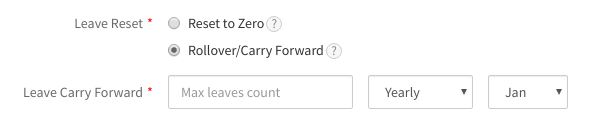
By entering the max leaves count, You can set the limit to carry forward of the available leaves of employees either monthly or yearly based on your chosen option.
Step 9:
Leave Encashment: This is Optional. If required you can set the limit for leaves count which can be encashed from the available leave balance of the employee.
Here also you set the period as monthly or yearly. If Monthly is selected then every month the minimum(Number of leaves available, Encashment Count) will be encashed.
If Yearly is selected then every year for the month chosen, the minimum(Number of leaves available, Encashment Count) will be encashed.
Step 10:
After selecting one the options Reset to Zero or RollOver/Carryforward, choose one of the options for Leave Restriction.

-
If ‘No’ is selected, then there will be no limit for employees to create leaves in a month.
-
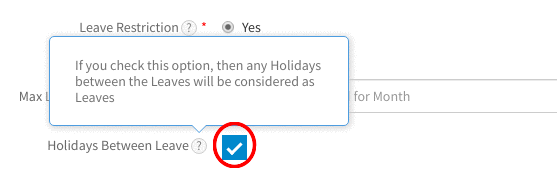
If ‘Yes’ is selected, then a text box will appear to capture the maximum count of leaves that are allowed for employees in a month for the above selected Leave type.

Step 11:
If you want to set the leave restriction, Select the ‘Yes’ radio button and enter the Max Leaves Allowed for the Month in the text box.
Step 12:
Holidays Between Leaves: If you check this box, then the holidays between the leaves will be automatically considered as leave for the employees and the according the employees’ leave balance will be updated.
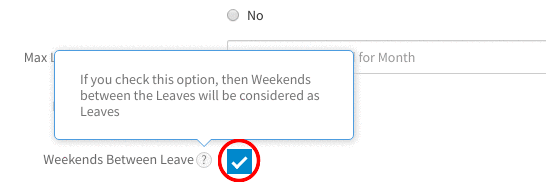
Step 13:
Weekends Between Leaves: If you check this box, then the Weekends between the leaves will be automatically considered as leave for the employees and the according the employees’ leave balance will be updated.
Step 14:
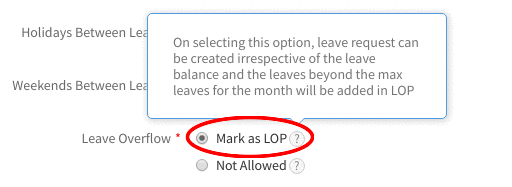
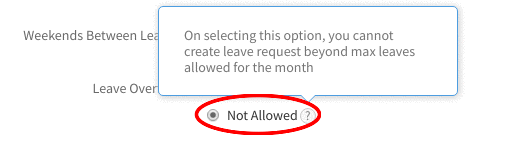
Leave Overflow: Select one of the 2 options “Mark as LOP” or “Not Allowed”.
Mark as LOP: If this option is selected then the employees can create leave requests even if they don’t have any available leave. The leaves which are created beyond the limit will be considered as loss of pay (LOP).
Not Allowed: If this option is selected then the employees cannot create the leave request beyond maximum limit of allowed leaves in a month.
Step 15:
Click on the “Save” button to set the leave policy rules for the chosen leave type.
Step 16:
On click on the “Save” button a confirmation message is displayed in the popup.
Step 17:
Click on “Close” button close the popup.
Step 18:
On click on “Close” button, the popup will be closed and you can see the leave type is assigned to the policy listed in the grid with the policy details for the leave type.
Assigning Employees to Leave Policy:
There are 2 ways of assigning employees to the leave Policy
-
From the Leave Policy.
-
From View Employee.
1.Assigning Employees to leave policy from Leave Policy Popup modal:
Step 1:
Click on the Leave Policy name to which you want to assign the employees.
Step 2:
On clicking on the Policy name a Popup modal will be displayed with 2 tabs/steps.
Step 3:
Click on the “Continue” button to go 2nd step Assign Employees.
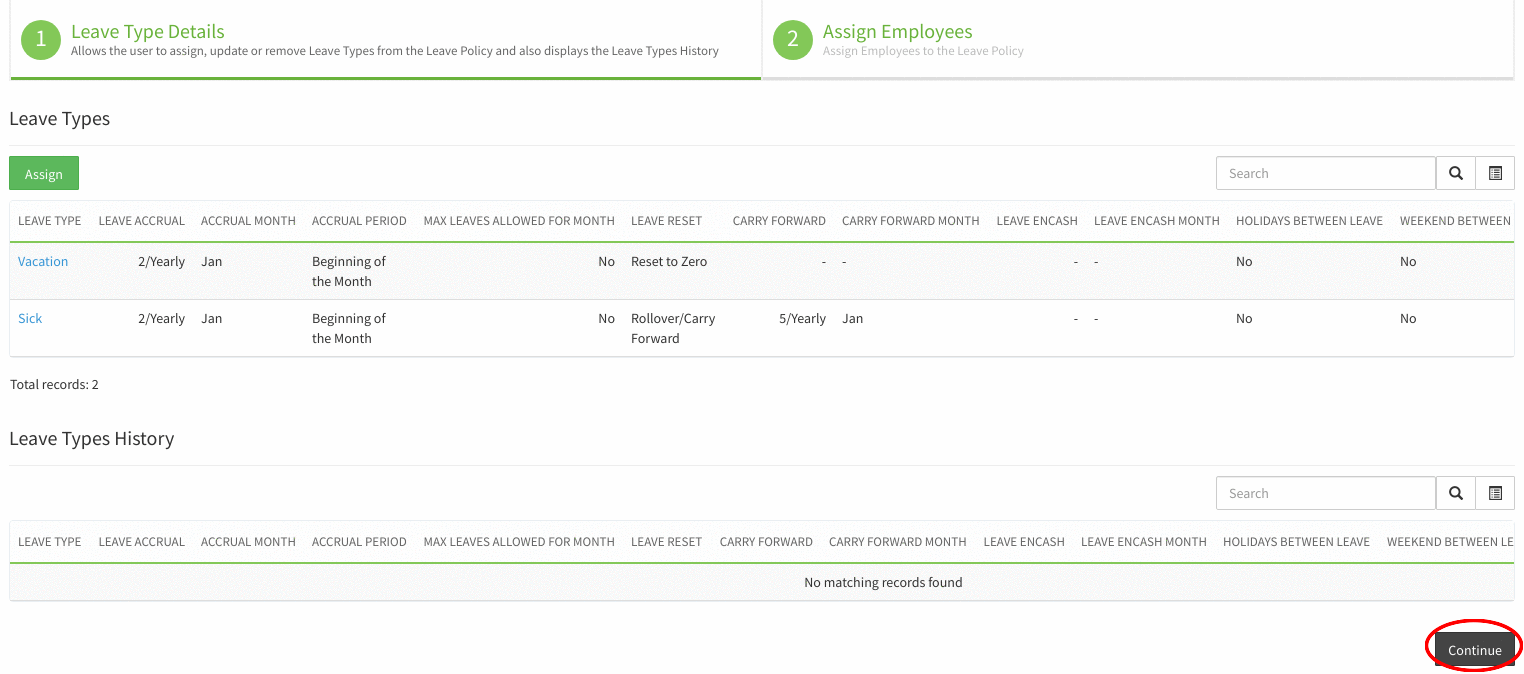
Step 4:
On Click on “Continue” button, assign employees step will be displayed.

Step 5:
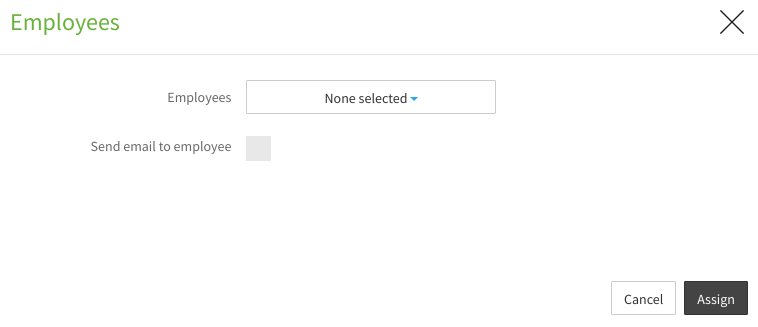
Click on “Assign Employees” button.
Step 6:
On Click on the “Assign Employees” button Employees popup will be displayed on the screen.
{primary} Note: If all the employees in your organization are assigned to a leave policy then the following message will be displayed on the screen. If you want to re-assign policy to the employee then you have to go to view employee and then choose the policy to assign to the employee.
Step 7:
Select Employees from the drop-down and click on “Assign” button.
{primary} Note: If you check the “Send email to employee” check box then email notification will be sent to the selected employees. Email won’t be sent to the Employees whose email details are not there.
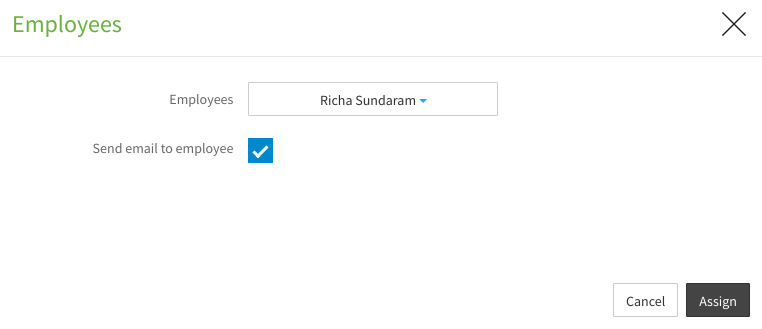
Step 8:
On click on “Assign” button a confirmation is displayed in the popup.
Step 9:
Click on “Close” button to close the popup-window.
Step 10:
On closing the popup you can see the selected employee will be listed in the Assigned employees grid in the Leave policy pop-up modal.
2.Assigning Employees to leave policy from View Employee:
Step 1:
Go to Employees -> View Employee
Step 2:
Click on the employee name to whom you want to assign the leave policy.
Step 3:
On clicking on the employee name in the grid, the employee details will be opened on the screen.
Step 4:
Click on the burger menu as shown in the following screenshot.
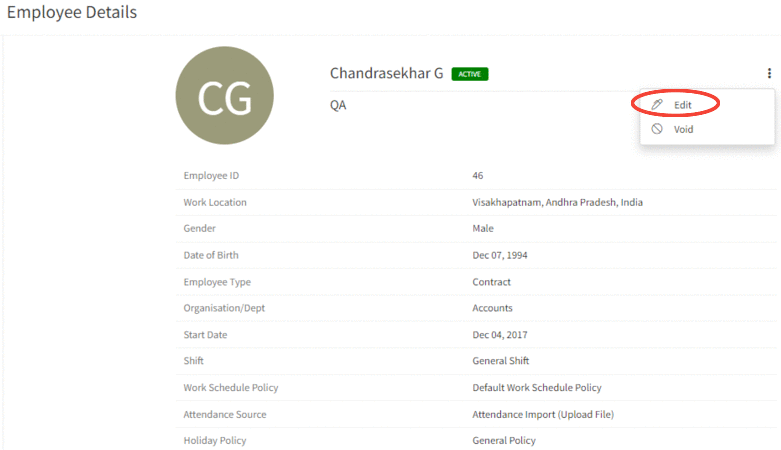
Step 5:
On click on the burger menu, the employee details popup will be displayed on the screen.
Step 6:
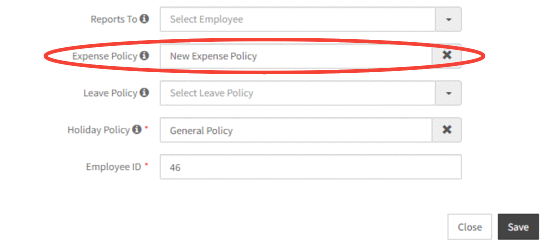
Scroll down and select the leave policy from the Leave Policy drop-down.
Step 7:
After selecting the leave policy from the drop-down,click on “Save” button to assign the leave policy to the employee.
Step 8:
On click on “Save” button a confirmation is displayed in the popup.
Step 9:
Click on “Close” button to close the popup-window.
Step 10:
On Closing the popup, you can view the employees details with the leave policy assigned to the employee.